

DIY wooden signs have transcended mere craft projects to become a powerful medium for personal expression, home décor enhancement, and even small-scale entrepreneurship. The tactile warmth of wood, combined with the infinite possibilities of personalization, offers a uniquely satisfying creative outlet. Whether you’re looking to add a charming touch to your living room, create a memorable gift, or start a thriving online business, understanding the fundamentals and nuances of crafting DIY wooden signs is paramount. This guide will walk you through every essential step, from selecting the right materials to mastering advanced finishing techniques, ensuring your creations are not only beautiful but also durable and professionally presented.
- The Allure and Versatility of DIY Wooden Signs
- Essential Tools and Materials for Your DIY Wooden Sign Project
- Designing Your DIY Wooden Sign: From Concept to Sketch
- Crafting Techniques: Bringing Your DIY Wooden Sign to Life
- Troubleshooting Common DIY Wooden Sign Challenges
- Creating Professional Finishes for Longevity and Appeal
- Selling Your DIY Wooden Signs: From Hobby to Business
- Frequently Asked Questions
The allure of a handcrafted DIY wooden sign lies in its ability to imbue a space with personality and warmth, a tangible representation of individual style that mass-produced items simply cannot replicate.
The journey into the world of DIY wooden signs begins with a fundamental appreciation for the material itself. Wood, with its inherent variations in grain, color, and texture, provides a canvas that is both rustic and sophisticated. The process is more than just cutting and painting; it’s an exploration of design, color theory, and the satisfying transformation of raw materials into bespoke art pieces. As you discover more, you’ll find that mastering this craft requires a blend of artistic vision and practical know-how.
The Allure and Versatility of DIY Wooden Signs
The enduring popularity of DIY wooden signs stems from their unparalleled versatility. They can be tailored to suit any aesthetic, from modern minimalist to farmhouse chic, rustic lodge to bohemian haven. Imagine a custom welcome sign greeting guests at your entryway, a witty quote adorning your kitchen wall, or a personalized family name sign gracing your mantlepiece. The possibilities are virtually boundless, limited only by your imagination. Beyond aesthetics, these signs offer a tangible connection to craftsmanship in an increasingly digital world. There’s an inherent satisfaction in creating something beautiful and functional with your own hands, a sentiment echoed by many crafters.
Wikipedia: Contents — Wikipedia
When it comes to DIY Wooden, Research by the craft industry association indicates handmade home décor items saw a significant surge in popularity, with personalized wooden signs frequently cited as a top trend, suggesting a strong market and consumer desire for unique pieces.
The accessibility of DIY wooden signs is another key factor in their widespread appeal. Unlike complex woodworking projects that require extensive tools and expertise, creating a basic wooden sign can be accomplished with relatively few supplies. This low barrier to entry invites a broad range of individuals, from complete beginners to seasoned DIY enthusiasts, to engage with the craft. Furthermore, the scalability of the project allows for growth; one can start with simple painted lettering and gradually progress to more intricate techniques like wood burning, carving, or epoxy resin inlays. This adaptability ensures that the craft remains engaging and challenging as one’s skills develop.
Essential Tools and Materials for Your DIY Wooden Sign Project
Embarking on your DIY wooden sign journey requires a foundational set of tools and materials. While advanced techniques might necessitate specialized equipment, a solid starting point can be established with a few key items.
Choosing the Right Wood
In the context of DIY Wooden, The selection of wood is arguably the most critical decision, as it dictates the overall look, feel, and durability of your sign.
- Plywood: An economical and stable option, particularly for painted signs. Birch or Baltic birch plywood offers a smooth surface and minimal grain, ideal for clean lettering. It’s important to opt for cabinet-grade plywood for a smoother finish.
- Pine Boards: Widely available and affordable, pine is a softwood that is easy to cut and work with. Its natural grain patterns can add character, though it can also be prone to dents and scratches. Kiln-dried pine is generally preferred for stability.
- MDF (Medium-Density Fiberboard): While not technically wood, MDF provides an exceptionally smooth, paintable surface. However, it is susceptible to moisture damage and can be heavy, making it less ideal for hanging signs.
- Reclaimed Wood: For a truly rustic and eco-friendly aesthetic, consider using reclaimed wood from old fences, pallets, or barn doors. This option adds immense character and a unique story to your sign, but requires thorough cleaning, sanding, and checking for nails or staples.
Around DIY Wooden, 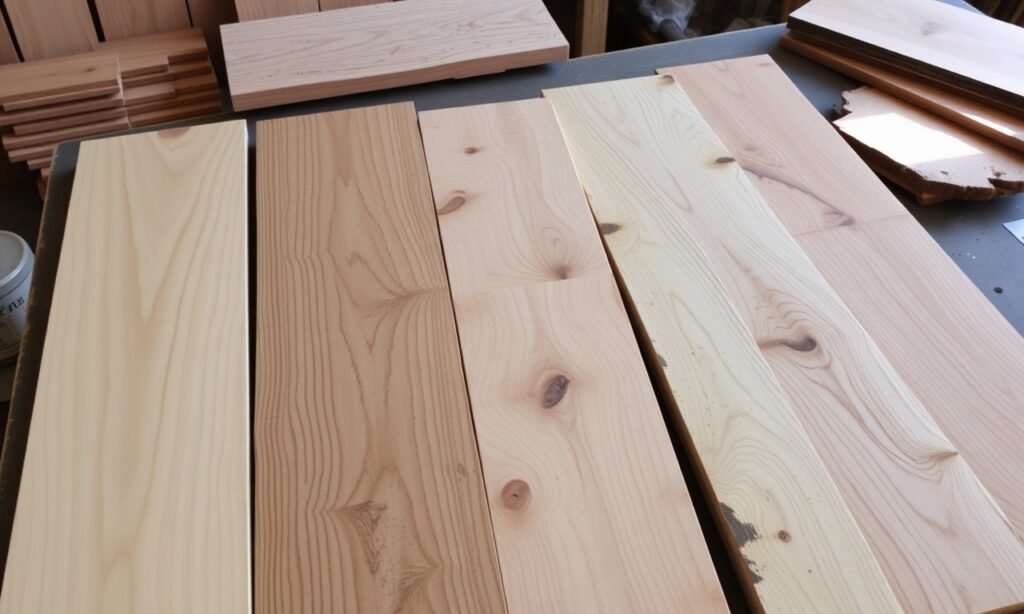
Regarding DIY Wooden, When selecting wood, pay attention to its moisture content. Wood that is too wet can warp or crack as it dries, compromising the integrity of your sign. Purchasing wood from reputable lumber yards or hardware stores that store their materials properly is advisable. Furthermore, consider the thickness of the wood. For smaller signs, 1/2-inch to 3/4-inch thickness is usually sufficient. For larger, more substantial pieces, 1-inch or thicker boards might be necessary to prevent bowing, especially if the sign will be displayed outdoors.
Essential Tools for Cutting and Shaping
When it comes to DIY Wooden, The tools required will depend on the complexity of your design and the type of wood you choose.
- Measuring Tape and Pencil: For accurate layout and marking.
- Saw: A handsaw can suffice for simple cuts, but a jigsaw or miter saw offers greater precision and ease of use for straight or angled cuts. For intricate shapes, a scroll saw is invaluable.
- Sandpaper: A variety of grits (e.g., 80, 120, 220) are crucial for smoothing edges, preparing surfaces for paint, and achieving a professional finish. An orbital sander can significantly speed up this process.
- Clamps: Essential for holding pieces together while gluing or painting.
- Drill with Bits: For creating pilot holes for hanging hardware or for decorative elements.
- Safety Gear: Always prioritize safety. This includes safety glasses to protect your eyes from sawdust and debris, and gloves to protect your hands.
In the context of DIY Wooden, 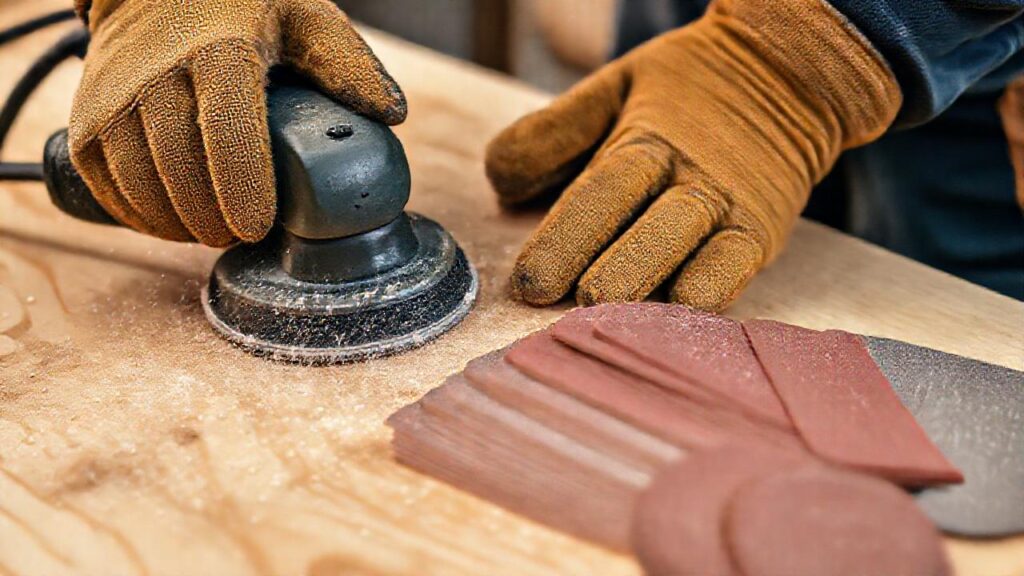
Painting and Finishing Supplies
This is where your sign truly comes to life.
- Primer: A good quality primer ensures even paint adhesion and coverage, especially on wood with prominent grain or knots.
- Paints: Acrylic paints are popular for their vibrant colors and quick drying times. Latex paints are also suitable for larger areas. Consider chalk paint for a matte, distressed finish, or oil-based paints for a durable, high-gloss look.
- Brushes and Rollers: A variety of brush sizes and types (e.g., foam brushes for smooth finishes, bristle brushes for detail work) are necessary. Small foam rollers are excellent for covering large, flat surfaces efficiently.
- Stencils or Transfer Paper: For creating precise lettering and designs.
- Clear Sealant: A topcoat of polyurethane, polycrylic, or a clear spray sealant protects the paint and wood from wear, moisture, and UV damage, extending the life of your sign.
- Wood Stain (Optional): For enhancing the natural grain of the wood before painting or for a stained finish.
Designing Your DIY Wooden Sign: From Concept to Sketch
Around DIY Wooden, The design phase is where creativity truly takes flight. A well-conceived design ensures your sign is not only visually appealing but also effectively communicates its intended message.
Brainstorming and Inspiration
Regarding DIY Wooden, Start by gathering inspiration. Pinterest, Instagram, and home décor magazines are excellent resources. Consider the intended location and purpose of your sign. Is it for a specific room, an event, or a gift? This context will guide your design choices regarding size, style, and content. Think about:
- Theme: Farmhouse, modern, nautical, holiday-specific, inspirational, humorous.
- Color Palette: Complementary colors, accent colors, or monochromatic schemes.
- Typography: Serif, sans-serif, script, or a combination. The font choice significantly impacts the overall mood.
- Imagery: Simple graphics, silhouettes, or intricate illustrations.
Sketching and Prototyping
When it comes to DIY Wooden, Once you have a general idea, it’s time to sketch. Don’t worry about perfection at this stage; focus on conveying your concept. Experiment with different layouts, font sizes, and element placements.
In the context of DIY Wooden, For lettering, consider the visual weight of different fonts. A bold, blocky font will command attention, while a delicate script might require more space to be legible. If you’re combining multiple fonts, ensure they complement each other rather than clash. The rule of thumb is often to pair a serif with a sans-serif or a script with a simple sans-serif.
Transferring Your Design to Wood
Around DIY Wooden, Once your design is finalized, you need to transfer it onto the wood surface. Several methods exist, each with its own advantages:
- Carbon Transfer Paper: This is a popular and effective method for precise lettering. Print or draw your design onto paper, then place carbon transfer paper (carbon side down) onto the wood. Trace over your design with a pencil or stylus, and the carbon will transfer the outline.
- Stencils: Pre-made or custom-cut stencils are excellent for repeating patterns or complex designs. You can create stencils using a cutting machine like a Cricut or Silhouette, or by carefully cutting out designs from cardstock.
- Freehand: For the artistically inclined, drawing directly onto the wood with a pencil or chalk is an option. This offers the most freedom but requires confidence and a steady hand.
Regarding DIY Wooden, When transferring, ensure your wood surface is clean and smooth. For lighter wood, use white or light-colored carbon paper. For darker woods, consider using chalk for your transfer outline. Always double-check your placement and alignment before making any permanent marks.
Crafting Techniques: Bringing Your DIY Wooden Sign to Life
With your design transferred, the real crafting begins. This stage involves applying paint, stain, or other decorative elements to realize your vision.
Painting Techniques
Painting is the most common method for decorating DIY wooden signs.
- Solid Color Application: For a clean, modern look, apply thin, even coats of your chosen paint. Allow each coat to dry completely before applying the next. Use a high-quality brush or foam roller for a smooth finish.
- Distressing: To achieve a vintage or farmhouse look, distress the sign after painting. Lightly sand edges or specific areas to reveal the wood beneath. Alternatively, paint a base coat, let it dry, apply a contrasting color, and then distress to show both layers.
- Layering and Ombre: Create depth by layering colors or blending them for an ombre effect. This requires careful blending while the paint is still wet.
- Stenciling: When using stencils, ensure they are firmly adhered to the wood to prevent paint bleeding. Use a dabbing motion with a stencil brush or sponge for crisp edges. Remove the stencil carefully once the paint is dry to the touch.
The quality of your paint matters. For signs that will be displayed outdoors or in high-traffic areas, opt for exterior-grade paints or seal them thoroughly with a robust topcoat.
Wood Staining and Finishing
Staining enhances the natural beauty of the wood grain and can dramatically alter its appearance.
- Applying Stain: Apply wood stain evenly with a brush or cloth, following the direction of the wood grain. Wipe off excess stain with a clean cloth after a few minutes, depending on the desired depth of color.
- Contrast Staining: For added visual interest, you can stain different parts of the wood with contrasting colors or use a dark stain to fill carved areas for a dramatic effect.
- Clear Coats: Once the paint or stain has fully dried, apply a clear sealant. Polyurethane, polycrylic, or a spray sealant provides protection. Multiple thin coats are better than one thick coat.
Advanced Techniques
For those looking to elevate their craft, consider these advanced techniques:
- Wood Burning (Pyrography): Using a wood-burning tool to create intricate designs and lettering by scorching the wood surface. This yields a unique, permanent, and textured effect.
- Routing and Carving: Employing a router or carving tools to create dimensional lettering or designs. This requires more specialized tools and precision but results in highly professional-looking pieces.
- Epoxy Resin Inlays: Filling carved-out sections with colored epoxy resin for a modern, glossy, and eye-catching effect. This can be used for lettering, graphics, or to create unique patterns.
Troubleshooting Common DIY Wooden Sign Challenges
Even with careful planning, challenges can arise. Knowing how to address them can save your project and your sanity.
Paint Bleeding
This often occurs when paint seeps under stencils or tape. Ensure stencils are securely adhered, and use a light “pounce” or dabbing motion with your brush rather than sweeping. For tape, ensure it’s pressed down firmly along the edge and consider a thin “seal coat” of the base color over the tape edge before applying the main color.
Uneven Staining
Wood porosity varies, leading to blotchy stain application. Using a pre-stain wood conditioner can help create a more uniform absorption. If the stain is already blotchy, you may need to sand it back and reapply, or embrace the variation as part of the rustic charm.
Warping or Cracking Wood
This is often due to changes in humidity or using improperly dried wood. For smaller signs, applying a sealant to all sides can help stabilize the wood. If significant warping occurs, you might need to reinforce the sign with a backing board or consider using a more stable material like plywood.
Sanding Dust Management
Sanding creates a lot of fine dust that can settle on surfaces and interfere with finishes. Use a shop vacuum with a dust collection system, wear a dust mask, and consider wet-sanding techniques for certain finishes to minimize airborne particles. Regularly clean your workspace to prevent dust contamination of your project.
Creating Professional Finishes for Longevity and Appeal
A professional finish elevates a DIY project from amateur to artisanal. It’s not just about aesthetics; it’s also about protecting your creation.
The Importance of Sealing
Sealing your wooden sign is crucial, especially if it will be exposed to the elements or handled frequently. A good sealant protects against moisture, UV rays, and general wear and tear.
- Polyurethane: Available in water-based (clearer finish) and oil-based (more durable, slight amber tint) versions. Apply in thin, even coats with a high-quality brush or foam applicator.
- Polycrylic: A water-based alternative to polyurethane that dries clear and is less prone to yellowing over time, making it ideal for light-colored or white signs.
- Spray Sealants: Convenient for intricate designs or when a very smooth, even coat is desired. Ensure even application to avoid drips and runs.
Always allow adequate drying time between coats as recommended by the manufacturer. Lightly sanding with very fine-grit sandpaper (e.g., 320 or 400 grit) between coats can create an exceptionally smooth finish.
Adding Hanging Hardware
The method you choose for hanging your sign depends on its size, weight, and intended location.
- Sawtooth Hangers: Suitable for lighter signs. Nail them securely into the back of the sign, ensuring they are centered and level.
- D-Rings and Wire: For heavier signs, D-rings screwed into the sides or back, connected by picture wire, provide a strong hanging solution.
- French Cleats: An excellent option for larger, heavier signs, distributing the weight evenly across the wall.
- Mounting Blocks: Small wooden blocks attached to the back can create a floating effect or provide a surface for mounting screws.
Ensure the hardware is rated for the weight of your sign and is securely attached. Consider the placement of hardware so it is not visible from the front when the sign is displayed.
Selling Your DIY Wooden Signs: From Hobby to Business
Many crafters discover a passion for DIY wooden signs that blossoms into a profitable venture. If you’re considering selling your creations, here are key considerations:
Pricing Your Work
Accurately pricing your signs involves calculating material costs, your time (at a reasonable hourly rate), and overhead (tools, workspace, marketing). Research comparable items on platforms like Etsy to gauge market value. Don’t undervalue your skill and effort.
Marketing and Sales Channels
- Online Marketplaces: Etsy, Shopify, and even your own website are popular platforms for selling handmade goods. High-quality photographs are paramount.
- Social Media: Instagram and Facebook are powerful tools for showcasing your work, engaging with potential customers, and running targeted ads. Use relevant hashtags like #DIYWoodenSigns, #HandmadeDecor, #CustomSigns.
- Local Craft Fairs and Markets: These offer direct interaction with customers and immediate sales opportunities.
Photography and Presentation
Professional product photography is non-negotiable for online sales. Use good lighting (natural light is often best), clear backgrounds, and show the sign in a styled setting to help customers visualize it in their own homes.
The journey of creating DIY wooden signs is a rewarding one, offering a blend of artistic expression and practical skill development. By understanding the materials, mastering the techniques, and paying attention to the finishing touches, you can craft beautiful, personalized décor that brings warmth and character to any space. Whether for personal enjoyment or as a budding business, the world of DIY wooden signs offers a rich and fulfilling creative landscape.
Frequently Asked Questions
What is the best type of wood for beginners making DIY wooden signs?
For beginners, pine boards are an excellent choice. They are readily available, relatively inexpensive, and easy to cut and work with. Their natural grain can add character, and they accept paint and stain well. Baltic birch plywood is also a good option for a smoother, more consistent surface, particularly if you plan on detailed painting or vinyl applications.
How do I ensure my painted lettering is straight and evenly spaced?
Precise lettering can be achieved through several methods. Using carbon transfer paper allows you to trace a printed or drawn design with accuracy. Alternatively, vinyl stencils cut with a machine like a Cricut or Silhouette offer perfect replication. For freehand lettering, practicing on paper first and using a light pencil or chalk outline on the wood can help maintain straight lines and consistent spacing.
Can DIY wooden signs be displayed outdoors?
Yes, DIY wooden signs can be displayed outdoors, but they require proper sealing and finishing to withstand the elements. Use exterior-grade paints and sealants, such as marine-grade polyurethane or outdoor-specific varnishes. Ensure all edges and surfaces are thoroughly coated. Consider using naturally weather-resistant wood like cedar or redwood if possible, though treated pine can also work.
What is the difference between wood stain and paint?
Wood stain penetrates the wood and enhances its natural grain, coloring the wood itself. It typically results in a more translucent finish that allows the wood’s texture to show through. Paint, on the other hand, forms a solid layer on the surface of the wood, obscuring the grain. Paint offers a wider range of opaque colors and finishes, from matte to high gloss.
How can I make my DIY wooden signs look more professional?
To achieve a professional look, focus on meticulous preparation and finishing. This includes sanding surfaces smooth, applying a quality primer, using fine-grit sandpaper between paint or sealant coats, and ensuring all edges are clean and crisp. The choice of hardware and how it’s attached also significantly impacts the final presentation. Investing in good quality brushes and tools will also contribute to a superior finish.
See also: DIY Wooden