
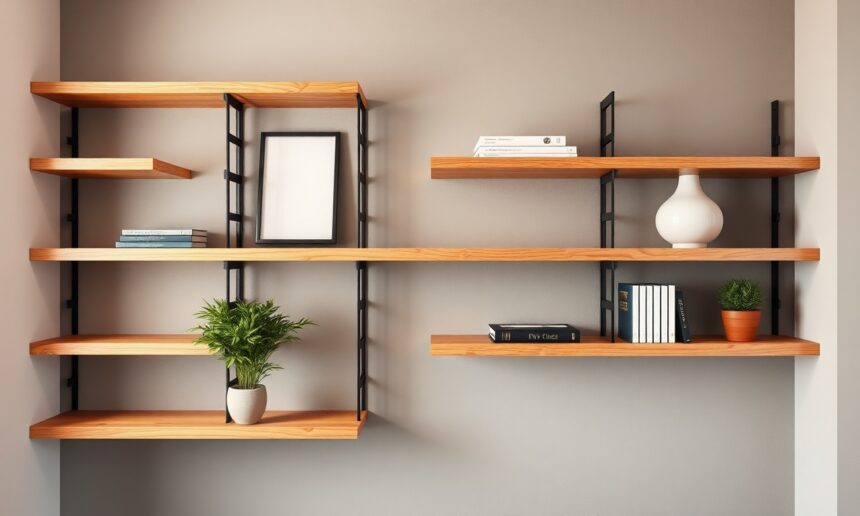
The Enduring Allure of Wooden Floating Shelves
When it comes to Wooden Floating, “The beauty of a well-designed space lies not just in its aesthetic, but in its ability to tell a story. Floating shelves, particularly those crafted from wood, offer a unique narrative of minimalist elegance and functional artistry.”
- The Enduring Allure of Wooden Floating Shelves
- Choosing Your Perfect Wooden Floating Shelf
- Material Matters: Wood Types and Their Characteristics
- Size and Depth: Balancing Aesthetics and Functionality
- Finish and Style: Complementing Your Interior Palette
- The Art of Installation: Ensuring a Secure and Seamless Fit
- Locating Wall Studs: The Foundation of Stability
- Mounting the Bracket: The Invisible Support System
- Attaching the Shelf: The Final Illusion
- 💡 Expert Insight Expert Insight: For very long shelves (over 48 inches), consider using a bracket with more than two support arms or consult a professional to ensure adequate support and prevent potential sagging over time.
- Styling Your Wooden Floating Shelves for Maximum Impact
- Curating Your Collection: Less is Often More
- Layering and Depth: Creating Visual Interest
- Thematic Styling: Telling a Story
- 💡 Expert Insight Expert Insight: When styling, step back frequently to view the shelf from different angles. This helps you identify areas that feel too cluttered or too sparse and allows for adjustments that create better visual harmony.
- Troubleshooting Common Floating Shelf Issues
- Shelf Sagging or Wobbling
- Solutions:** Re-secure the Bracket: If the shelf is wobbly, remove the shelf and re-tighten all screws attaching the bracket to the studs. If the screws feel stripped or don’t tighten, you may need to use larger screws or relocate the bracket slightly to a more solid part of the stud. Reinforce with Additional Support: For sagging shelves, especially longer ones, consider adding a second, smaller bracket underneath the center of the shelf for added support. Ensure this secondary bracket is also securely fastened to a stud. Check Shelf Integrity: In rare cases, the shelf material itself might be too weak or damaged. Inspect the shelf for cracks or signs of stress. Uneven Installation
- Frequently Asked Questions
- What is the primary advantage of wooden floating shelves over traditional shelves?
- How much weight can a typical wooden floating shelf hold?
- Can I install wooden floating shelves on any type of wall?
- What is the best way to clean and maintain wooden floating shelves?
- Are there any specific tools required for installing wooden floating shelves?
- Final Recommendations for Your Wooden Floating Shelf Project
Wikipedia: Contents — Wikipedia
Wooden floating shelves have transcended mere decorative elements to become a cornerstone of modern interior design. Their inherent simplicity, coupled with the warmth and character of natural wood, allows them to smoothly connect into virtually any décor style, from rustic farmhouse to sleek contemporary. The magic of a floating shelf lies in its illusion of defying gravity, appearing to be suspended effortlessly from the wall. This visual lightness creates an open, uncluttered feel, making them an ideal solution for maximizing both storage and visual appeal in smaller or more compact spaces. Beyond their aesthetic appeal, wooden floating shelves are remarkably versatile, serving as platforms for cherished photographs, beloved books, statement art pieces, or essential everyday items.
In the context of Wooden Floating, Their adaptability makes them a truly indispensable feature in the contemporary home.
Key Takeaways:
- Wooden floating shelves offer a sophisticated blend of minimalist aesthetics and functional utility, enhancing visual space.
- The natural warmth and varied textures of wood allow these shelves to complement a wide spectrum of interior design styles.
- Proper installation is paramount for both safety and the desired ‘floating’ visual effect, requiring careful consideration of wall type and load-bearing capacity.
- Strategic styling transforms utilitarian shelves into captivating displays that reflect personal taste and enhance room ambiance.
Understanding the Anatomy of a Floating Shelf
At its core, a wooden floating shelf is a hollow structure designed to conceal its mounting hardware. Unlike traditional shelves that are supported by visible brackets, floating shelves utilize an internal bracket system. This system typically consists of metal rods or a sturdy frame that is securely fastened to the wall studs. The wooden shelf itself is then designed with pre-drilled holes or a channel that slides over these rods, effectively hiding the support mechanism. The result is a clean, uninterrupted surface that appears to float against the wall. The construction can vary significantly, from simple hollow boxes to more complex designs featuring integrated LED lighting or unique edge profiles.
Around Wooden Floating, The choice of wood also matter significantly, with options ranging from the robust character of reclaimed wood to the refined elegance of walnut or the cost-effectiveness of pine.
The Unseen Engineering: How They Stay Afloat
Regarding Wooden Floating, The illusion of weightlessness is achieved through meticulous engineering and proper installation. The internal bracket is the unsung hero of the floating shelf. These brackets are typically made from heavy-gauge steel to ensure maximum strength and stability. They are designed to be anchored directly into the wall studs, which are the vertical structural members of your wall framing. This direct connection to the framing is absolutely critical, as drywall alone cannot support the weight of the shelf and its intended contents. The rods or arms of the bracket extend outwards from the wall, and the shelf is then slid onto these supports.
When it comes to Wooden Floating, The depth of the shelf and the length of the bracket arms are carefully calibrated to ensure that the shelf is balanced and that the weight is distributed evenly across the bracket and, consequently, the wall studs. Manufacturers often provide specific weight capacity guidelines for their shelves, which should always be adhered to for safety. Research indicates that a properly installed floating shelf anchored into studs can often support upwards of 30-50 pounds, depending on the shelf’s construction and bracket strength.
Choosing Your Perfect Wooden Floating Shelf
The selection process for wooden floating shelves involves a harmonious blend of aesthetic preference, practical application, and structural consideration. The sheer variety available today means there’s a perfect fit for nearly every conceivable space and style.
Material Matters: Wood Types and Their Characteristics
In the context of Wooden Floating, The choice of wood is perhaps the most impactful decision in defining the character of your floating shelves. Each wood species brings its own unique grain patterns, color variations, and inherent durability.
- Pine: A popular choice for its affordability and ease of workability. Pine offers a lighter color and a distinct grain. It’s softer than hardwoods, making it more susceptible to dings and scratches, but its rustic charm is undeniable, especially when stained or painted.
- Oak: Known for its strength, durability, and beautiful, prominent grain patterns. Oak lends a sense of timeless elegance and robustness. Red oak and white oak offer slightly different hues and grain characteristics, both being excellent choices for substantial shelving.
- Walnut: A premium hardwood celebrated for its rich, deep brown color and luxurious, often wavy grain. Walnut exudes sophistication and is a fantastic choice for high-end applications where a statement piece is desired.
- Maple: Offers a smooth, fine grain and a pale, creamy color. Maple is very durable and takes stains well, allowing for a wide range of finishes. Its subtle beauty makes it a versatile option for modern and transitional interiors.
- Reclaimed Wood: For those seeking unparalleled character and a story, reclaimed wood shelves are unmatched. Sourced from old barns, factories, or buildings, these shelves possess a unique patina, nail holes, and imperfections that add immense depth and a rustic, historical narrative to a space.
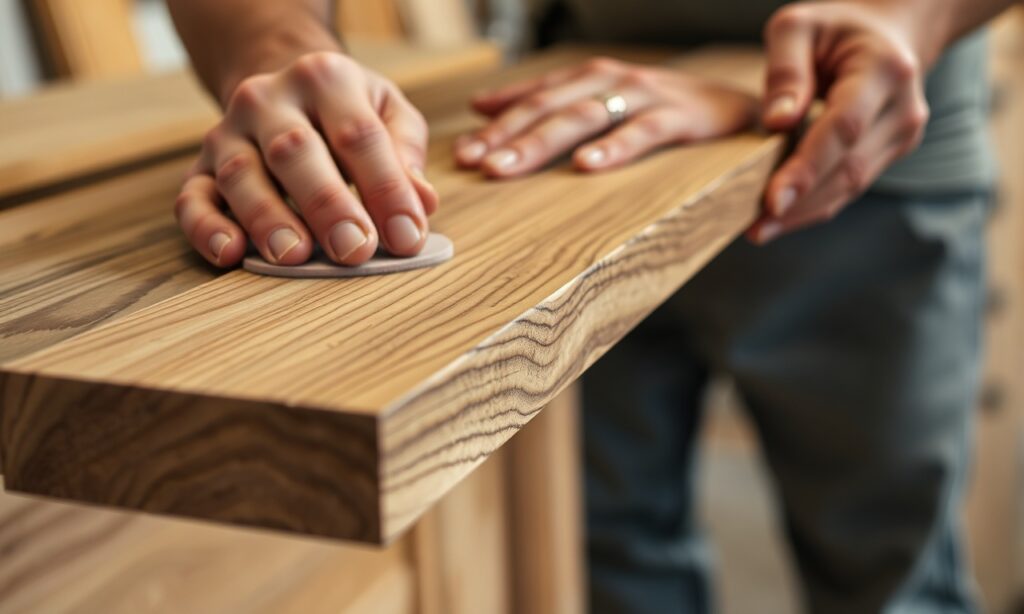
Size and Depth: Balancing Aesthetics and Functionality
Around Wooden Floating, The dimensions of your floating shelves should be carefully considered in relation to the wall space and the intended use. A common mistake is opting for shelves that are either too small to be impactful or too large, overwhelming the room.
- Depth: This refers to how far the shelf extends from the wall. Standard depths typically range from 6 to 12 inches. Deeper shelves (10-12 inches) are ideal for displaying larger items like sizable books, plants, or decorative vases. Shallower shelves (6-8 inches) are excellent for smaller knick-knacks, framed photos, or for use in tighter spaces like hallways or above a doorway. The depth should also be proportionate to the items you plan to display; placing a small trinket on a very deep shelf can look lost.
- Length: The length of the shelf should be balanced with the wall it occupies. A long, narrow shelf can create a dramatic horizontal line, while multiple shorter shelves stacked vertically can add visual interest and break up a large wall. Always consider the surrounding elements—doorways, windows, furniture—to ensure the shelf placement feels cohesive and not cramped.
Finish and Style: Complementing Your Interior Palette
The finish applied to your wooden floating shelves is the final touch that bridges their raw material to your existing décor. Whether you aim for a natural, understated look or a bold statement, the finish is key.
- Natural/Clear Coat: For woods like oak, walnut, or maple, a clear sealant or a light natural finish can best showcase the wood’s inherent beauty, grain, and color. This approach is ideal for modern, minimalist, or Scandinavian-inspired interiors.
- Stained: Stains offer a way to alter the wood’s color while still allowing the grain to show through. Dark stains like espresso or walnut can add depth and drama, fitting well in traditional or industrial settings. Lighter stains can achieve a more contemporary or farmhouse feel.
- Painted: Painting shelves provides a bold color statement or a smoothly connect with a monochromatic scheme. High-gloss finishes can lend a modern, sophisticated air, while matte finishes offer a softer, more subtle look. Popular choices include crisp white, deep charcoal, or vibrant accent colors.
- Distressed/Aged: Techniques like whitewashing or deliberate distressing can impart a vintage or farmhouse aesthetic, making the shelves appear as if they’ve been part of the home for years.
The Art of Installation: Ensuring a Secure and Seamless Fit
Regarding Wooden Floating, The perceived simplicity of floating shelves belies the critical importance of their installation. A poorly installed shelf is not only an eyesore but a significant safety hazard. This is where meticulous attention to detail and understanding your wall structure become paramount.
Locating Wall Studs: The Foundation of Stability
When it comes to Wooden Floating, This is the single most crucial step. Wall studs are the vertical wooden or metal beams that form the skeletal structure of your walls. They are typically spaced 16 or 24 inches apart on center.
- Find the Studs: The most reliable method is using a stud finder. Electronic stud finders are readily available and generally accurate. Alternatively, you can tap on the wall; a solid thud indicates a stud, while a hollow sound suggests empty space. You can also look for clues like electrical outlet boxes, which are usually attached to studs.
- Marking Stud Locations: Once a stud is located, use a pencil to mark its edges and center clearly on the wall. Repeat this process at least at two points where your shelf will be mounted, ensuring these points are aligned horizontally.
- Confirm with a Small Nail: For absolute certainty, after marking, gently tap a small finishing nail into the wall at your marked center point. If you hit solid wood, you’ve found a stud. If you encounter resistance or the nail bends, you’ve likely missed.
In the context of Wooden Floating, 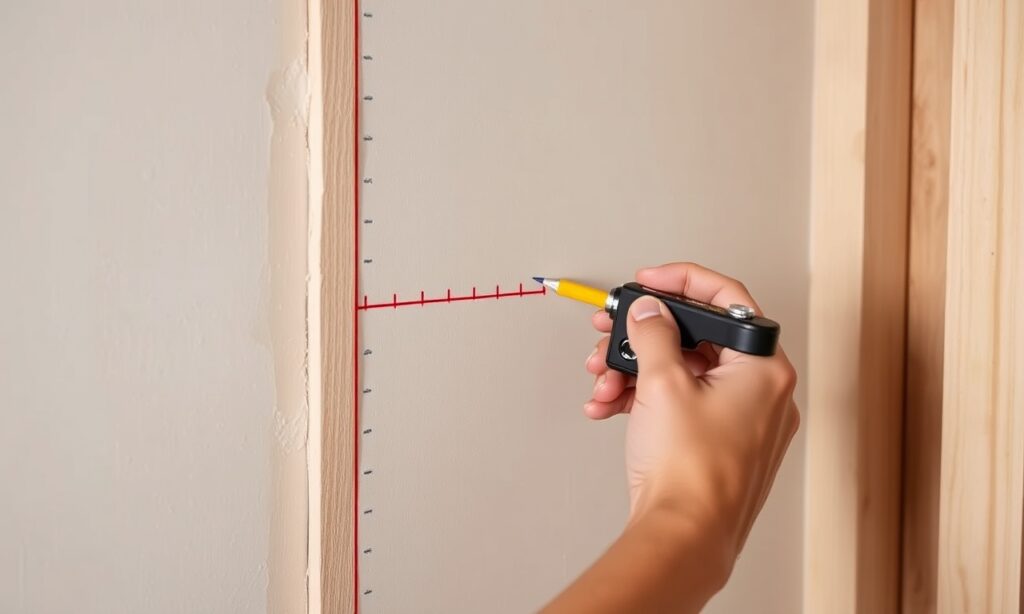
Mounting the Bracket: The Invisible Support System
The bracket is the backbone of your floating shelf. Its secure attachment dictates the shelf’s load-bearing capacity and longevity.
- Position the Bracket: Hold the floating shelf bracket against the wall, aligning its mounting holes with the stud marks you’ve made. Ensure the bracket is perfectly level using a spirit level.
- Drill Pilot Holes: Using a drill bit that is slightly smaller than the diameter of your mounting screws, drill pilot holes through the bracket’s holes and into the center of the wall studs. This prevents the wood from splitting and makes driving the screws easier.
- Secure the Bracket: Drive sturdy lag screws or wood screws through the bracket’s holes and into the pilot holes in the studs. Use screws specifically designed for wood construction. Ensure the bracket is tightened firmly against the wall. Double-check that it remains perfectly level.
Attaching the Shelf: The Final Illusion
With the bracket securely in place, the final step is to slide the shelf onto the support arms.
- Slide the Shelf: Carefully align the pre-drilled holes or the hollow channel on the back of the wooden shelf with the support rods extending from the mounted bracket. Gently but firmly slide the shelf onto the rods until it is flush against the wall.
- Secure the Shelf (if applicable): Some floating shelf systems include small set screws on the underside of the shelf that screw into the support rods to prevent the shelf from sliding off. If your system has these, tighten them gently.
- Final Check: Once the shelf is in place, give it a gentle push and pull to ensure it feels solid and secure. Check for any wobbling. If it feels loose, carefully remove the shelf and re-check the bracket’s attachment to the studs.
💡 Expert Insight
Expert Insight: For very long shelves (over 48 inches), consider using a bracket with more than two support arms or consult a professional to ensure adequate support and prevent potential sagging over time.
Styling Your Wooden Floating Shelves for Maximum Impact
Once installed, wooden floating shelves become a blank canvas for personal expression. The art of styling is what transforms them from functional storage into captivating design elements.
Curating Your Collection: Less is Often More
The minimalist nature of floating shelves often calls for a curated approach to styling. Overcrowding can detract from the shelves’ visual appeal and the items displayed.
- Balance and Symmetry: Arrange items to create visual balance. This can be achieved through symmetry (e.g., placing two identical objects on either side of a central piece) or asymmetry, where different sized objects are arranged to create a pleasing visual flow.
- Varying Heights and Textures: Mix items of different heights and textures to add visual interest. Combine a tall vase with a stack of books and a small ceramic figurine, for example. The interplay of smooth, rough, matte, and glossy textures keeps the display dynamic.
- Negative Space: Don’t feel compelled to fill every inch of the shelf. Strategically placed empty space, or “negative space,” allows the displayed items to breathe and stand out. This is crucial for maintaining the minimalist aesthetic of floating shelves.
Layering and Depth: Creating Visual Interest
Layering items can add a sense of depth and dimension to your shelf display, making it more engaging.
- Front to Back: Place larger items towards the back of the shelf and smaller items in front, layered around them. This creates a natural depth and prevents smaller items from being hidden.
- Leaning Art: Lean framed artwork or photographs against the wall on the shelf, then place smaller objects in front. This adds a sophisticated, gallery-like feel.
- Plants as Accents: Small potted plants or succulents can introduce a touch of nature and vibrant color, breaking up the visual monotony of objects and books.
Thematic Styling: Telling a Story
Consider styling your shelves around a particular theme or color palette to create a cohesive and impactful display.
- Book Nooks: Dedicate a shelf or two to your favorite books, arranging them by color, size, or theme. Add a small decorative object or a reading lamp to complete the look.
- Gallery Wall Alternative: Use shelves to display a collection of framed photographs or small pieces of art, interspersed with decorative objects. This offers a softer, more flexible alternative to a traditional gallery wall.
- Seasonal Decor: Rotate items seasonally. In autumn, display pumpkins and warm-toned decor; in winter, add festive ornaments; in spring, incorporate floral elements.
“The true elegance of wooden floating shelves lies in their ability to disappear, allowing the curated objects they hold to become the stars of the show.”
💡 Expert Insight
Expert Insight: When styling, step back frequently to view the shelf from different angles. This helps you identify areas that feel too cluttered or too sparse and allows for adjustments that create better visual harmony.
Troubleshooting Common Floating Shelf Issues
Even with the best intentions, installation and styling can sometimes present challenges. Addressing these proactively can save you time and frustration.
Shelf Sagging or Wobbling
This is almost always an installation issue.
- Sagging: If a shelf begins to sag, it indicates that the bracket is not strong enough for the load, or it wasn’t properly secured into multiple studs. The shelf might be too long for a single bracket.
- Wobbling: A wobbly shelf suggests the bracket is loose on the wall. This could be due to screws not being fully tightened, screws not being anchored into studs, or the wall material itself being compromised.
Uneven Installation
If the shelf isn’t level, it can look unprofessional and items may slide off.
- Solutions: The most common cause is an unlevel bracket. Carefully remove the shelf and bracket, re-mark your stud locations, and re-mount the bracket, paying meticulous attention to using a spirit level at every stage. Sometimes, shims can be used behind the bracket to make minor adjustments for uneven walls, but this should be done with caution to maintain structural integrity.
Frequently Asked Questions
What is the primary advantage of wooden floating shelves over traditional shelves?
The primary advantage of wooden floating shelves is their aesthetic appeal. They create a clean, minimalist look by concealing all visible hardware, giving the illusion that the shelf is suspended in mid-air. This uncluttered appearance can make a room feel larger and more open, a significant benefit in smaller spaces.
How much weight can a typical wooden floating shelf hold?
The weight capacity of a wooden floating shelf varies considerably based on its construction, the type of wood, the strength of the internal bracket, and, most importantly, how it is installed. When properly installed into wall studs with a robust bracket, a standard 2-3 foot floating shelf can often support between 30 to 50 pounds. Always refer to the manufacturer’s specifications and err on the side of caution.
Can I install wooden floating shelves on any type of wall?
While it is possible to install floating shelves on various wall types, the method of attachment differs. For optimal strength and safety, direct anchoring into wall studs is highly recommended. If studs are not available in the desired location, you may need to use heavy-duty drywall anchors rated for significant weight, or consider alternative mounting solutions like French cleats, though these can compromise the “floating” aesthetic. For masonry walls (brick or concrete), specialized masonry anchors are required.
What is the best way to clean and maintain wooden floating shelves?
Maintenance depends on the finish. For shelves with a clear coat or natural finish, a soft, damp cloth is usually sufficient for cleaning. Avoid abrasive cleaners or excessive moisture, which can damage the wood or finish. For painted shelves, use a mild soap and water solution. For distressed or reclaimed wood, consult specific care instructions, as their unique surfaces may require specialized cleaning agents or techniques to preserve their character.
Are there any specific tools required for installing wooden floating shelves?
Yes, essential tools include a stud finder, a pencil for marking, a drill with appropriate drill bits for pilot holes and driving screws, a spirit level for ensuring accuracy, and a screwdriver or drill bit for tightening screws. Measuring tape is also crucial for accurate placement.
Final Recommendations for Your Wooden Floating Shelf Project
Embarking on a project involving wooden floating shelves is an opportunity to infuse your home with both style and practical utility. The journey from selection to styling is rewarding, and by adhering to sound principles of installation and design, you can achieve stunning results that elevate your interior décor. Always prioritize safety by thoroughly understanding your wall structure and ensuring the bracket is robustly anchored. When it comes to styling, embrace restraint and curate your displays thoughtfully, allowing each item to contribute to the overall narrative of your space.
Whether you’re looking to display cherished mementos, organize your favorite reads, or simply add a touch of sophisticated minimalism, wooden floating shelves offer an enduring solution that combines form and function beautifully.
See also: Wooden Floating